

Customize Your Sublime Text
It's quite surprising to think that I've already been on the frontend path for more than three years. After more than three years of accumulation, this young guy who 'self-taught himself into firewood' has, more or less, gained some experience. Experience has taught me that a handy and efficient editor can greatly improve your development efficiency. As I recall, I've been using Sublime Text 3 as my editor from the very beginning and never changed it. Of course, that doesn't mean I haven't tried other editors or IDEs; in fact, I've tried Brackets, Atom, VS Code, and JetBrains' Webstorm. All of these editors/IDEs are quite excellent, but they didn't feel quite right for me. I still love
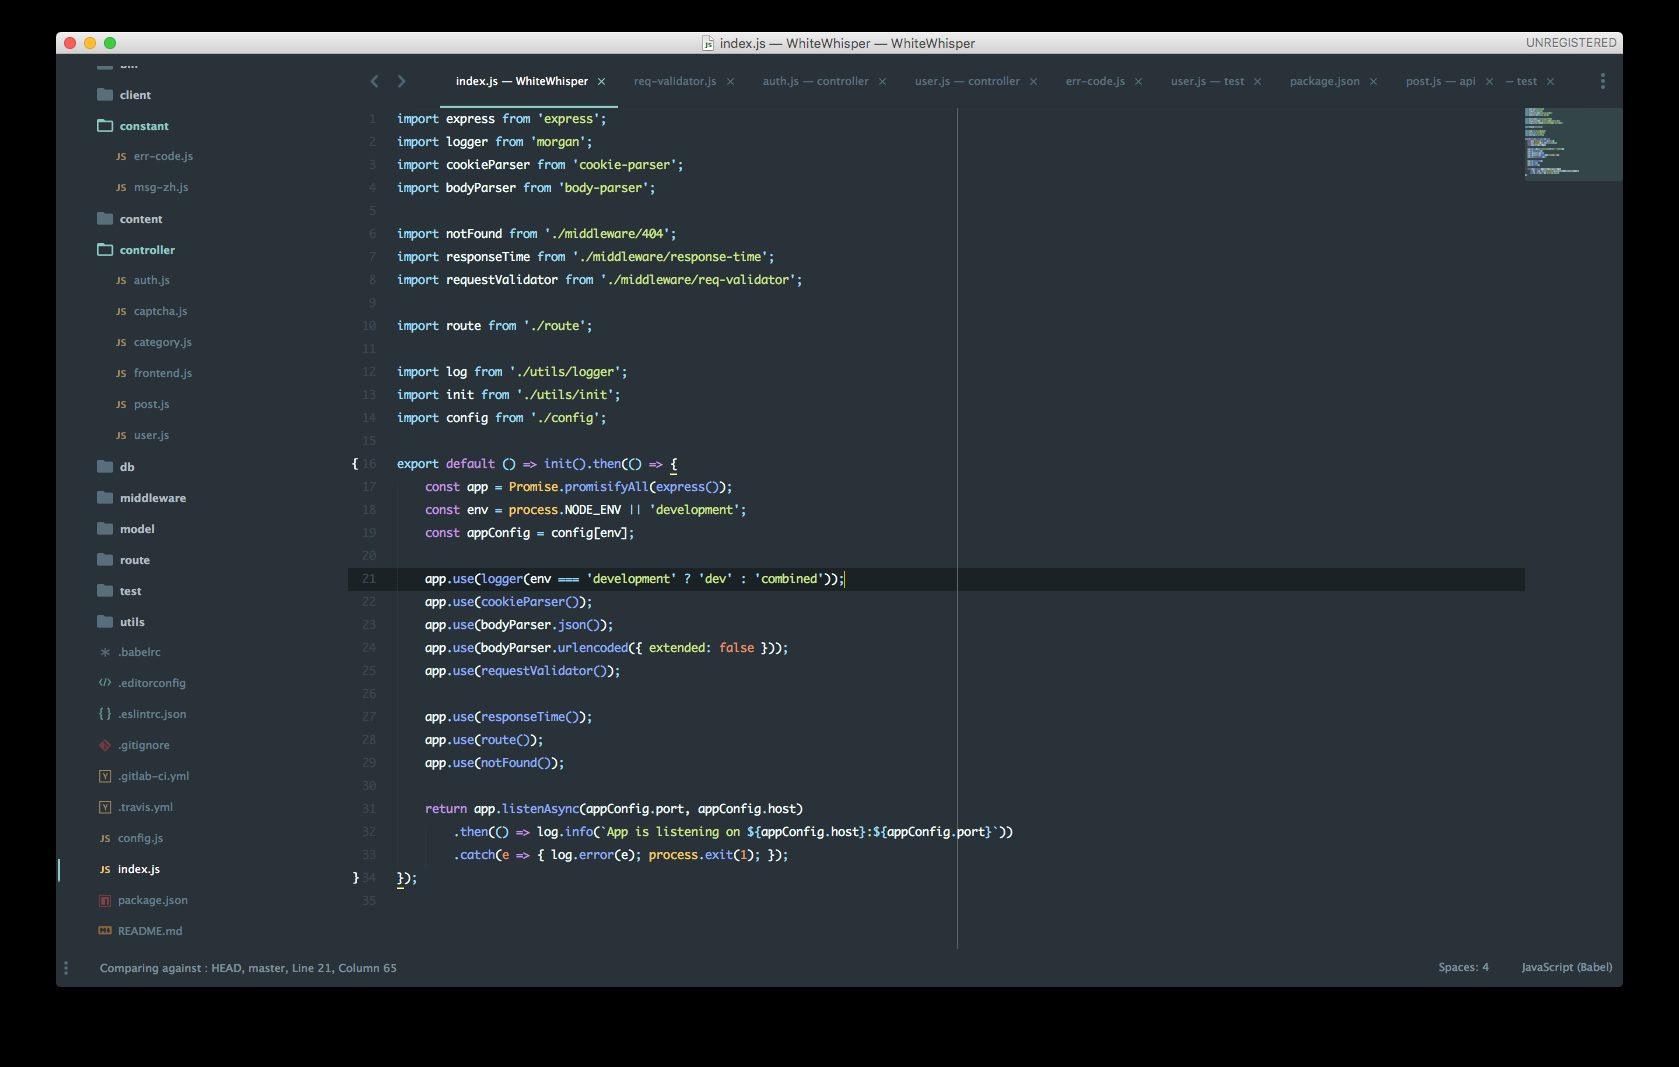
It's kind of surprising to think that I've been on the frontend path for more than three years now. Over three years of accumulation, this 'self-taught firewood' young man has also gained some experience, more or less. Experience tells me that a smooth and efficient editor can greatly improve your development efficiency. As I recall, I have used Sublime Text 3 as my editor from the very beginning and never changed it.
Of course, this doesn't mean I haven't tried other editors or IDEs; in fact, I've tried Brackets, Atom, VS Code, and Webstorm by JetBrains. These editors/IDEs are all quite excellent. But they didn't feel quite suitable for me. I still love Sublime Text more. Probably because Sublime Text is really too fast, and, more or less, a bit offirst-impressionpsychological effect, I suppose.
However, Sublime Text is not exactly an out-of-the-box editor either; it requires installing some additional plugins and going through a series of configurations to become smoother and more beautiful. Having used Sublime Text for so long, I have some experience, more or less, so I took some time to record it on my blog, hoping it might help others (In fact, this article has been lying in drafts; every time I enter the blog admin, the first thing I see is it. I feel a bit guilty if I don't finish it properly)。
OK, story begins.
First, I'd like to clarify that the Sublime Text all refers to Sublime Text 3. Compared with Sublime Text 2, 3's startup speed is faster than 2's by no small margin. Just this point alone, I think you can disregard 2. After all,In the world of martial arts, only speed is invincible, who doesn't like a faster opening speed, plus richer plugin support? Right? 😄
Download and install Sublime Text
Unlike Sublime Text 2, the download address for version 3 is hereSublime Text supports all platforms, so you don't need to worry about the software not working after migrating platforms (although on Linux, there is a small issue when typing Chinese in Sublime Text).
Sublime Text download page. Windows systems have a portable version for convenient use on the go.
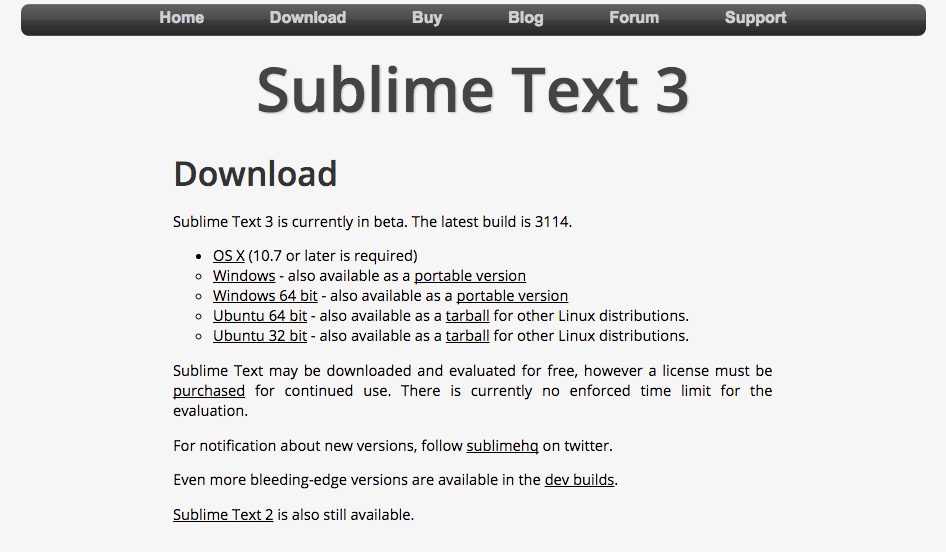
Sublime Text download page. Windows systems have a portable version for convenient use on the go.
The default interface looks like this:
This is a screenshot taken from the official website: the default UI on OS X; other platforms are similar.
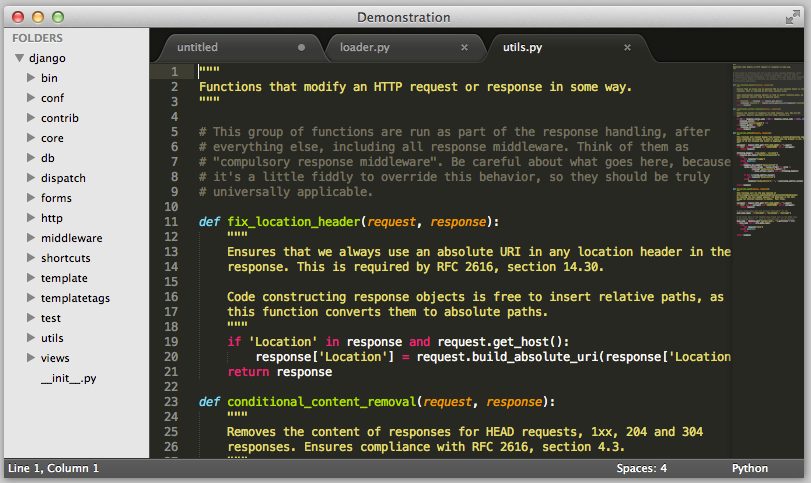
This is a screenshot taken from the official website: the default UI on OS X; other platforms are similar.
As you can see, although the default UI is not outstanding, a few years ago, compared with other editors, it was already a very comfortable and very good-looking interface. The default Color Scheme is Monokai, which is a fairly classic color scheme; I quite liked it when I first started using it. However, after looking at it for a long time, you will more or less get a little aesthetic fatigue. So in most cases I choose to install third-party themes. This part will be covered later.
Installing Package Control
A freshly installed Sublime Text does not allow you to install all kinds of plugins and skins at will. You first need to install one called Package Control plugin. As the name suggests, Package Control is Sublime Text's package manager. After installation, you can install and uninstall plugins very conveniently.
The installation method for Package Control can be found here found. It is actually just opening the Sublime Text console, copying and pasting a code snippet, pressing Enter, and you're done.
After clicking View -> Show Console in the Sublime Text menu bar, you can see the console.
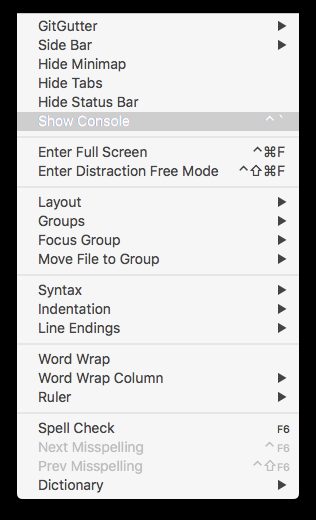
After clicking View -> Show Console in the Sublime Text menu bar, you can see the console.
After opening the console, paste the following code into it, then press Enter.
Note that the code below may not be up to date; to ensure a successful installation, it is recommended to copy the relevant code from the Package Control installation page.
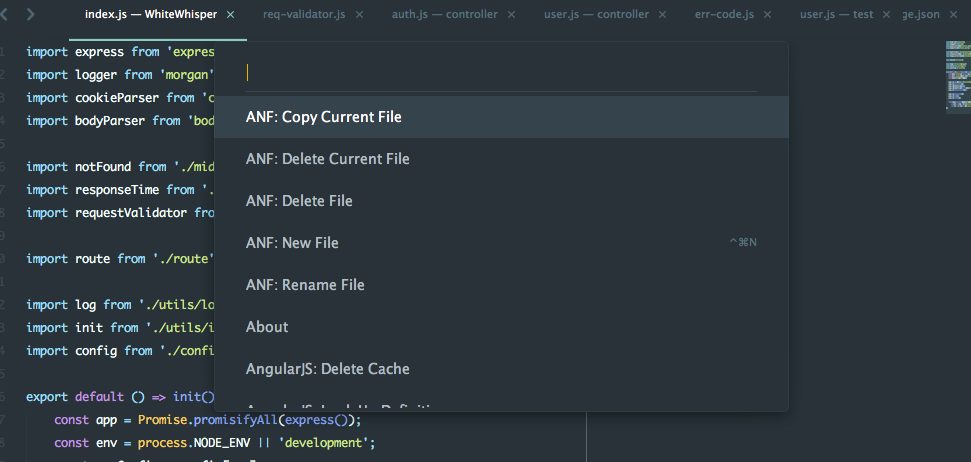
import urllib.request,os,hashlib; h = '2915d1851351e5ee549c20394736b442' + '8bc59f460fa1548d1514676163dafc88'; pf = 'Package Control.sublime-package'; ipp = sublime.installed_packages_path(); urllib.request.install_opener( urllib.request.build_opener( urllib.request.ProxyHandler()) ); by = urllib.request.urlopen( 'http://packagecontrol.io/' + pf.replace(' ', '%20')).read(); dh = hashlib.sha256(by).hexdigest(); print('Error validating download (got %s instead of %s), please try manual install' % (dh, h)) if dh != h else open(os.path.join( ipp, pf), 'wb' ).write(by)After installation, restart Sublime Text, then press Cmd + Shift + P, and you can see the Package Control panel:
Commonly Used Shortcuts
One of Sublime Text's great features is that it provides many highly efficient and easy-to-use shortcuts. Once you get used to them, they can double your coding efficiency, especially for editing and selection, where Sublime Text's shortcuts are very useful.
Key Symbol Explanation
- ⌘ : Command key
- ⌃ : Control key
- ⌫ : Delete key
- ↓ : Down arrow key
- ⌥ : Option or Alt key
- ↩ : Return or Enter key
- ⇧ : Shift key
- ↑ : Up arrow key
| Command | MacOS | Windows | Linux |
|---|---|---|---|
| Quickly Jump to Line N | ⌘ + G | Ctrl + G | Ctrl + G |
| Show Current Scope | ⌃ + ⇧ + P | Ctrl + ⇧ + Alt + P | Ctrl + ⇧ + Alt + P |
| Open Package Control Panel | ⌘ + ⇧ + P | Ctrl + ⇧ + P | Ctrl + ⇧ + P |
| Quickly Jump to Function or Style | ⌘ + R | Ctrl + R | |
| Switch File | ⌘ + P | Ctrl + P | Ctrl + P |
| Open/Close Sidebar | ⌘ + K, ⌘ + B | Ctrl + KB | Ctrl + KB |
One thing worth noting is that file switching in Sublime Text is very convenient. Its strength is that fuzzy matching is highly efficient, and it can be combined with quick jump to open a file and jump to the desired location at the same time.
For example, I want to open
index.js this file and jump to line 45, then after pressing Ctrl + P, I type: ind:45, and press Enter, which opens the file we want and automatically jumps to the location we need. Similarly, in addition to jumping to a specific line, you can also jump to a function; you only need to replace ind:45 with ind@main to open index.js this file and jump to main this function.| Command | MacOS | Windows | Linux |
|---|---|---|---|
| Add Cursor Above | ⌃ + ⇧ + Up | Ctrl + Alt + Up | Alt + ⇧ + Up |
| Insert Line Above | ⌘ + ⇧ + ↩ | Ctrl + ⇧ + ↩ | Ctrl + ⇧ + ↩ |
| Select Next Autocomplete Option | ⌃ + Space | Ctrl + Space | Ctrl + Space |
| Increase Indent of Current Line | ⌘ + ] | Ctrl + ] | Ctrl + ] |
| Comment | ⌘ + / | Ctrl + / | Ctrl + / |
| Multi-select | ⌃ + ⌘ + G | Alt + F3 | Alt + F3 |
| Insert after current line | ⌘ + ↩ | Ctrl + ↩ | Ctrl + ↩ |
| Select content inside current brackets | ⌃ + ⇧ + M | Ctrl + ⇧ + M | Ctrl + ⇧ + M |
| Move current line down | ⌘ + ⌃ + ↓ | Ctrl + ⇧ + ↓ | Ctrl + ⇧ + ↓ |
| Delete content from current cursor position to end of line | ⌘ + K,⌘ + K | Ctrl + KK | Ctrl + KK |
| Select content within current Scope | ⌘ + ⇧ + Space | Ctrl + ⇧ + Space | Ctrl + ⇧ + Space |
| Delete content from current cursor position to beginning of line | ⌘ + K + ⌫ | Ctrl + K + ⌫ | Ctrl + K + ⌫ |
| Duplicate current line | ⌘ + ⇧ + D | Ctrl + ⇧ + D | Ctrl + ⇧ + D |
| Move current line up | ⌘ + ⌃ + ↑ | Ctrl + ⇧ + ↑ | Ctrl + ⇧ + ↑ |
| Undo last action | ⌃ + U | Ctrl + U | Ctrl + U |
| Jump to the nearest bracket to the cursor | ⌃ + M | Ctrl + M | Ctrl + M |
| Select the word under the cursor | ⌘ + D | Ctrl + D | Ctrl + D |
| Create multiple cursors downward | ⌃ + ⇧ + Down | Ctrl + Alt + Down | Alt + ⇧ + Down |
| Outdent current line | ⌘ + [ | Ctrl + [ | Ctrl + [ |
| Block Comment | ⌘ + ⌥ + / | Ctrl + ⇧ + / | Ctrl + ⇧ + / |
| Join Lines | ⌘ + J | Ctrl + J | Ctrl + J |
| Delete line | ⌘ + X | Ctrl + X | Ctrl + X |
| Retry/Repeat last shortcut operation | ⌘ + Y | Ctrl + Y | Ctrl + Y |
| Select current line | ⌘ + L | Ctrl + L | Ctrl + L |
| Paste and auto-indent | ⌘ + ⇧ + V | Ctrl + ⇧ + V | Ctrl + ⇧ + V |
Among them
Ctrl + D 、 Ctrl + ⇧ + M and Ctrl + ⇧ + Space are very useful for selecting ranges.Ctrl + D Pressing repeatedly selects the next matching content below the current selection. This is very convenient for batch-editing a variable name, etc.Ctrl + ⇧ + M Pressing repeatedly keeps expanding the bracket range. Brackets is a general term for various types of brackets. This shortcut is very convenient for selecting content within a region.Ctrl + ⇧ + Space Similar to the shortcut above, except that this shortcut selects by Scope rather than brackets. Pressing repeatedly continues to expand the selected Scope.In addition,
Ctrl + Alt + Up/Down to create multiple cursors is also a very interesting and efficient shortcut. This feature can also be achieved by pressing Ctrl + 鼠标左键 to achieve this. If you need to uniformly edit 10 lines of text with the same content or consistent formatting, then this shortcut can help you handle this edit almost painlessly, instead of making you perform 10 operations for these 10 lines. This is where the benefits of batch processing become apparent.| Command | macOS | Windows | Linux |
|---|---|---|---|
| Find | ⌘ + F | Ctrl + F | Ctrl + F |
| Replace | ⌘ + ⌥ + F | Ctrl + H | Ctrl + H |
| Use current selection as search text | ⌘ + E | Ctrl + E | Ctrl + E |
| Use current selection as replace text | ⇧ + ⌘ + E | ⇧ + Ctrl + E | ⇧ + Ctrl + E |
| Find in Files | ⌘ + ⇧ + F | Ctrl + ⇧ + F | Ctrl + ⇧ + F |
Install packages
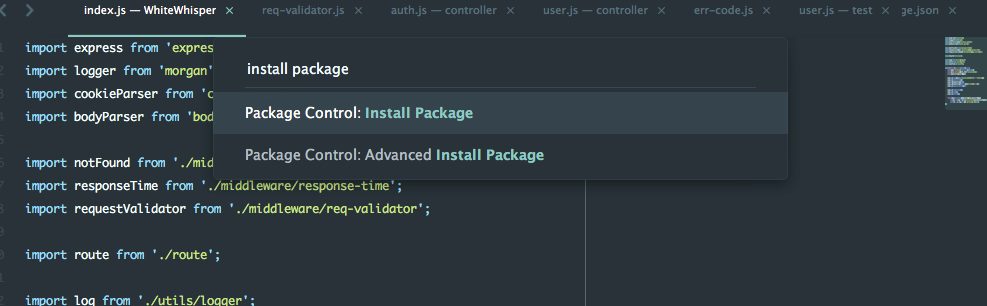
After opening the Package Control panel, you can happily install packages. In the panel, type
install packagethen press Enter, and once the package list has finished loading, you can see which packages are available to install.Type `install package` to see this screen. In fact, Sublime Text supports fuzzy search with very high match accuracy
Package list
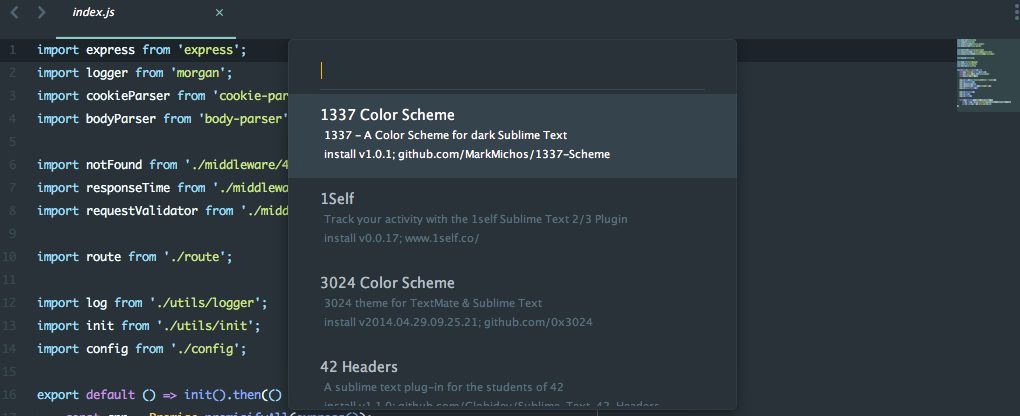
Next, just find a package you are interested in and press Enter to install it. If you don't know which packages to install, then you can visit Package Control's package list page to see what popular packages are available.
If you're a front-end developer, give the plugins I recommend below a try—I'm sure you'll love them~
Feature Enhancement
- This plugin makes it very convenient to create new files. Just press super+alt+n to see the prompt for creating a new file.It is worth noting that if the folder path you type does not itself exist, AdvancedNewFile will automatically create the folder for you, which is very convenient. This way, you don't have to create the folder first and then create the file, and you don't need to use the mouse to complete this action either—everything can be done without taking your hands off the keyboard.

- Alignment lets you align code very conveniently, making your code look cleaner, especially when you have a bunch of variable declarations, the code according to
=alignment, this is a great visual effect: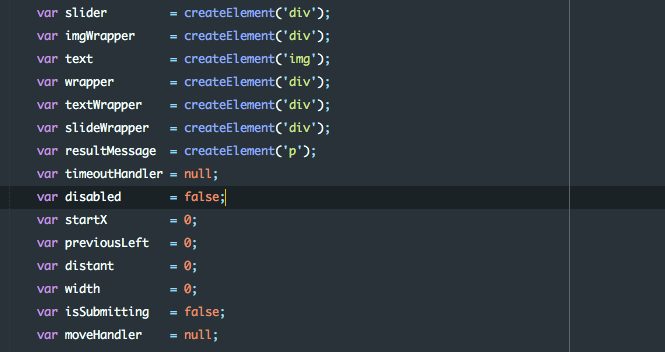
- BracketHighlighterBracketHighlighter can highlight the brackets in the current scope (including curly braces, square brackets, etc.), letting you know where the start and end of the current region are.
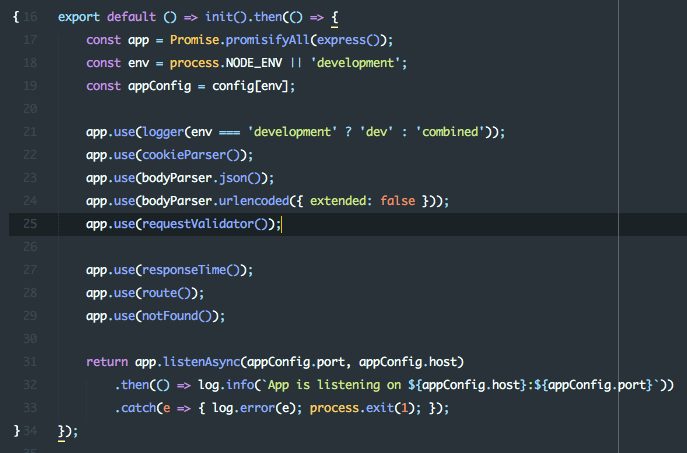
- This is a powerful tool for writing comments, making it very convenient to generate comments for functions and variables. You can find detailed usage instructions on the official website.
- I guess the vast majority of front-end developers are no strangers to Emmet, or rather to ZenCoding. Emmet's predecessor is ZenCoding, which improved front-end developers' efficiency by N times when writing HTML documents, making writing HTML no longer a painful process. For example, write the following in HTML:
ul>(li>a>(i+span))*10Then press the Tab key to generate the following code:
<ul><li><a href=""><i></i><span></span></a></li><li><a href=""><i></i><span></span></a></li><li><a href=""><i></i><span></span></a></li><li><a href=""><i></i><span></span></a></li><li><a href=""><i></i><span></span></a></li><li><a href=""><i></i><span></span></a></li><li><a href=""><i></i><span></span></a></li><li><a href=""><i></i><span></span></a></li><li><a href=""><i></i><span></span></a></li><li><a href=""><i></i><span></span></a></li></ul- This plugin allows Sublime Text to support EditorConfig. EditorConfig is a configuration file format that lets you define coding styles, so your code can maintain a consistent style even when edited on different platforms or in different editors, without having to configure the relevant coding style for each editor.
- LiveReload is a plugin that can monitor file changes and automatically refresh pages; it is also a powerful tool for front-end development. Once you use it, you no longer have to press F5 to refresh the browser while editing code.This plugin is more commonly used for smaller demo pages, because for larger projects people usually use BrowserSync to achieve live reloading with this kind of tool.
- This is a plugin that enhances the Sidebar functionality of Sublime Text. The native Sidebar is very limited in file management, while this plugin greatly expands the file management capabilities of the left Sidebar. Right-click a file or folder to see the following menu:
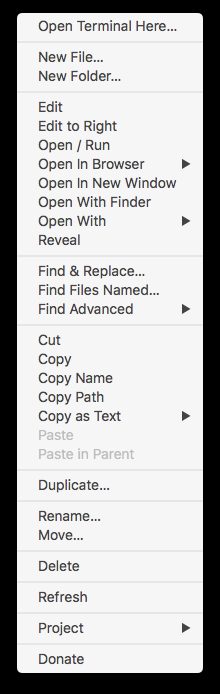
- A Markdown tool that helps you automatically generate Markdown previews and HTML, among other features. There are two styles of Markdown preview: one built into the plugin, and the other is GFM, which is GitHub Flavored Markdown.。Note that GFM directly calls the GitHub API to dynamically generate Markdown previews, so using GFM involves a request process. This request process can cause Sublime Text to become unresponsive. Therefore, I generally use the preview style built into the plugin. This plugin provides a very practical feature for people who frequently write Markdown. Combined with
MarkdownEditingWith this plugin, Sublime Text basically becomes an excellent Markdown editor.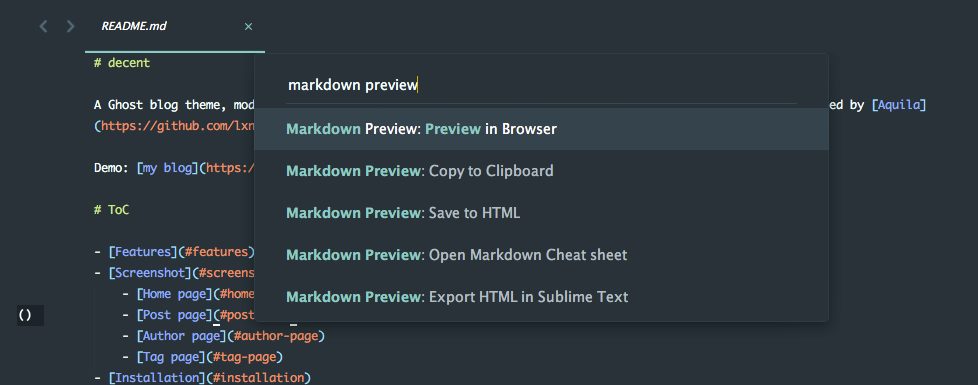
- This is a code linting framework. It is only a framework itself; you need to additionally install a Linter for a specific language to enable code linting. For example, after installing Eslint, if your project has an Eslint configuration file, Sublime Text will display the corresponding code linting hints to the left of the code.
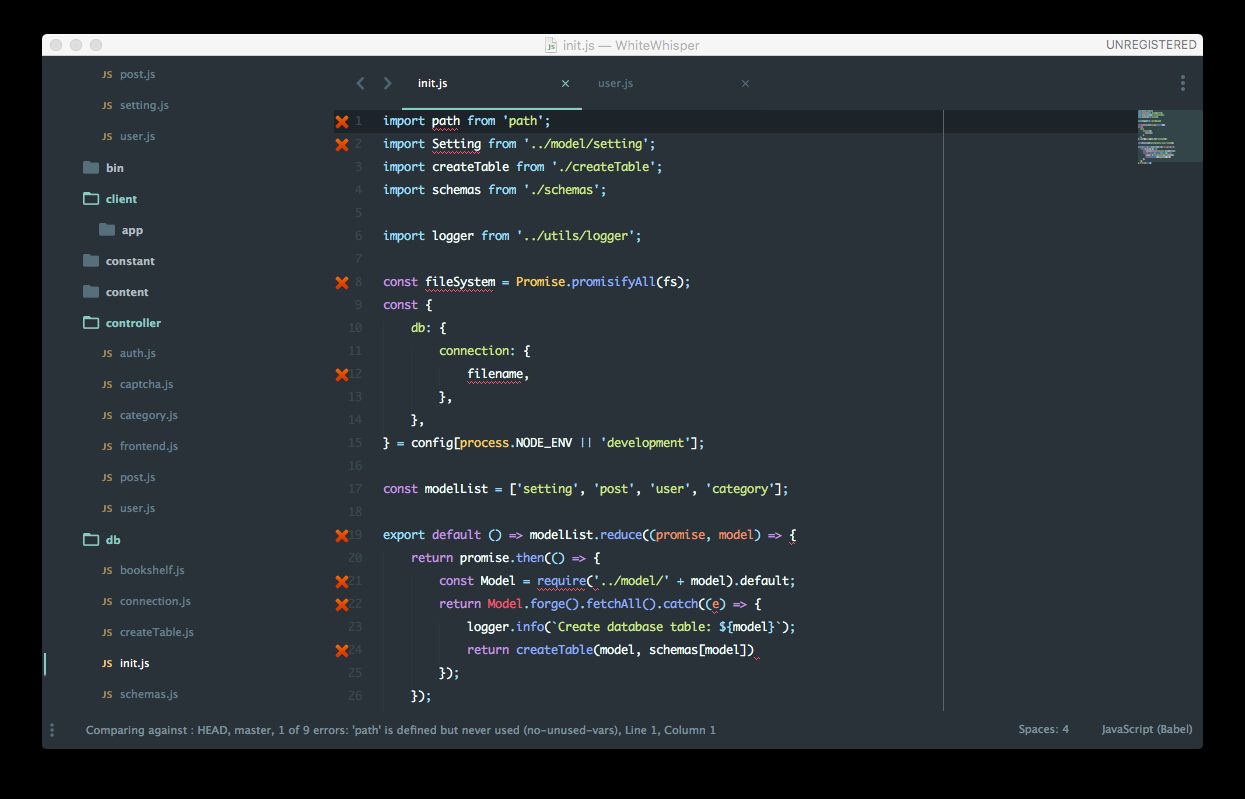 SublimeLinter displays error or warning messages to the left of the code, and then displays the error or warning messages for the current cursor line in the status bar at the bottom of the editor.This plugin is very useful for controlling programming code style. It can intuitively show you where there are problems in your code and where changes are needed (of course, these hints are based on your linter configuration; different configurations will produce different hint results).
 - A small plugin that can invoke Terminal directly inside Sublime Text, and by default enters the current project's directory. This is also a very practical plugin, because when writing code, you often find yourself opening the terminal after writing a piece of code to run some commands, such as running tests or executing a script.Therefore, with this plugin, even if you need to open a terminal while writing code, you don't have to take your hands off the keyboard, improving work efficiency.
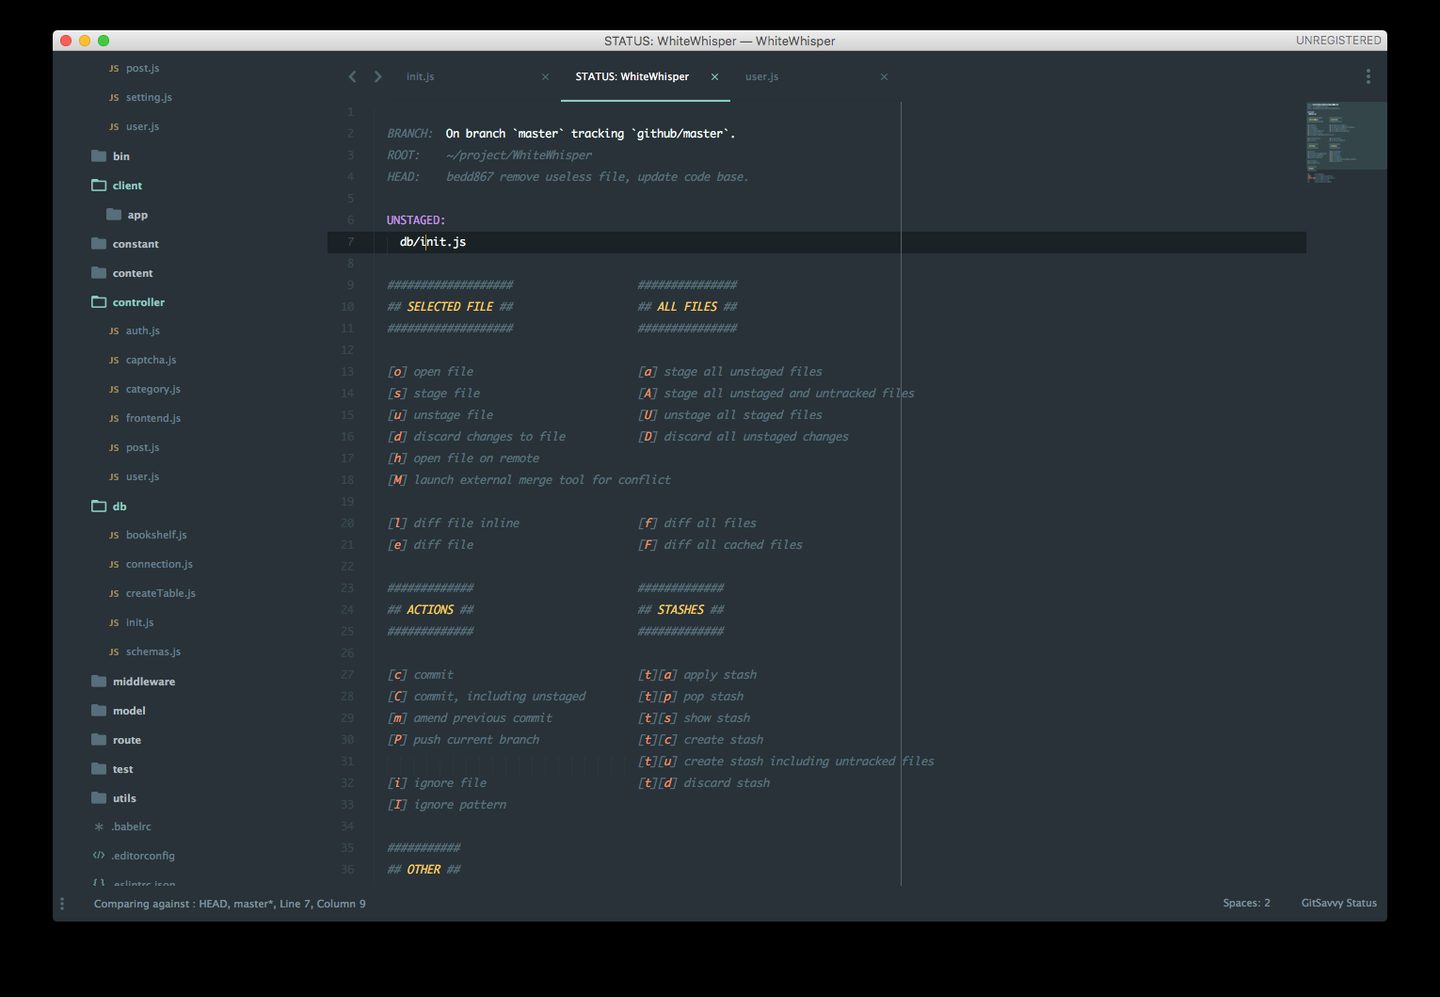
- A very handy Git tool that lets you perform Git operations very conveniently and very simply. Basically, common commands can all be executed through this plugin. What's even better is that you don't have to leave the keyboard during the entire process! When you open GitSavvy's interface, you can execute various Git commands by pressing different keys.By now, you should be able to see that an efficient coding workflow should keep both hands focused on the keyboard as much as possible, rather than reaching for the mouse from time to time to perform very basic but also tedious tasks.
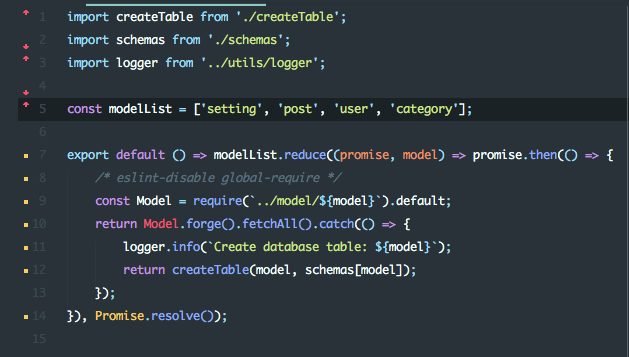
- This is also a Git-related plugin that can display changes to the current file in real time. It is also a very practical plugin.
Snippet Enhancement Category
What Snippet plugins basically do is completion, or automatically inserting a preset code snippet. No further introduction will be provided for this type of plugin.
- This plugin deserves special mention. It makes Sublime Text's autocomplete more powerful. It can match variable names or keywords from the currently open file, so when you are writing code, the autocomplete list will be much richer than before, making coding more convenient!
Syntax Support Enhancement Category
Syntax support plugins are, simply put, syntax highlighting, and some plugins also include compilation functionality. No further introduction will be provided for these plugins.
Theme Category
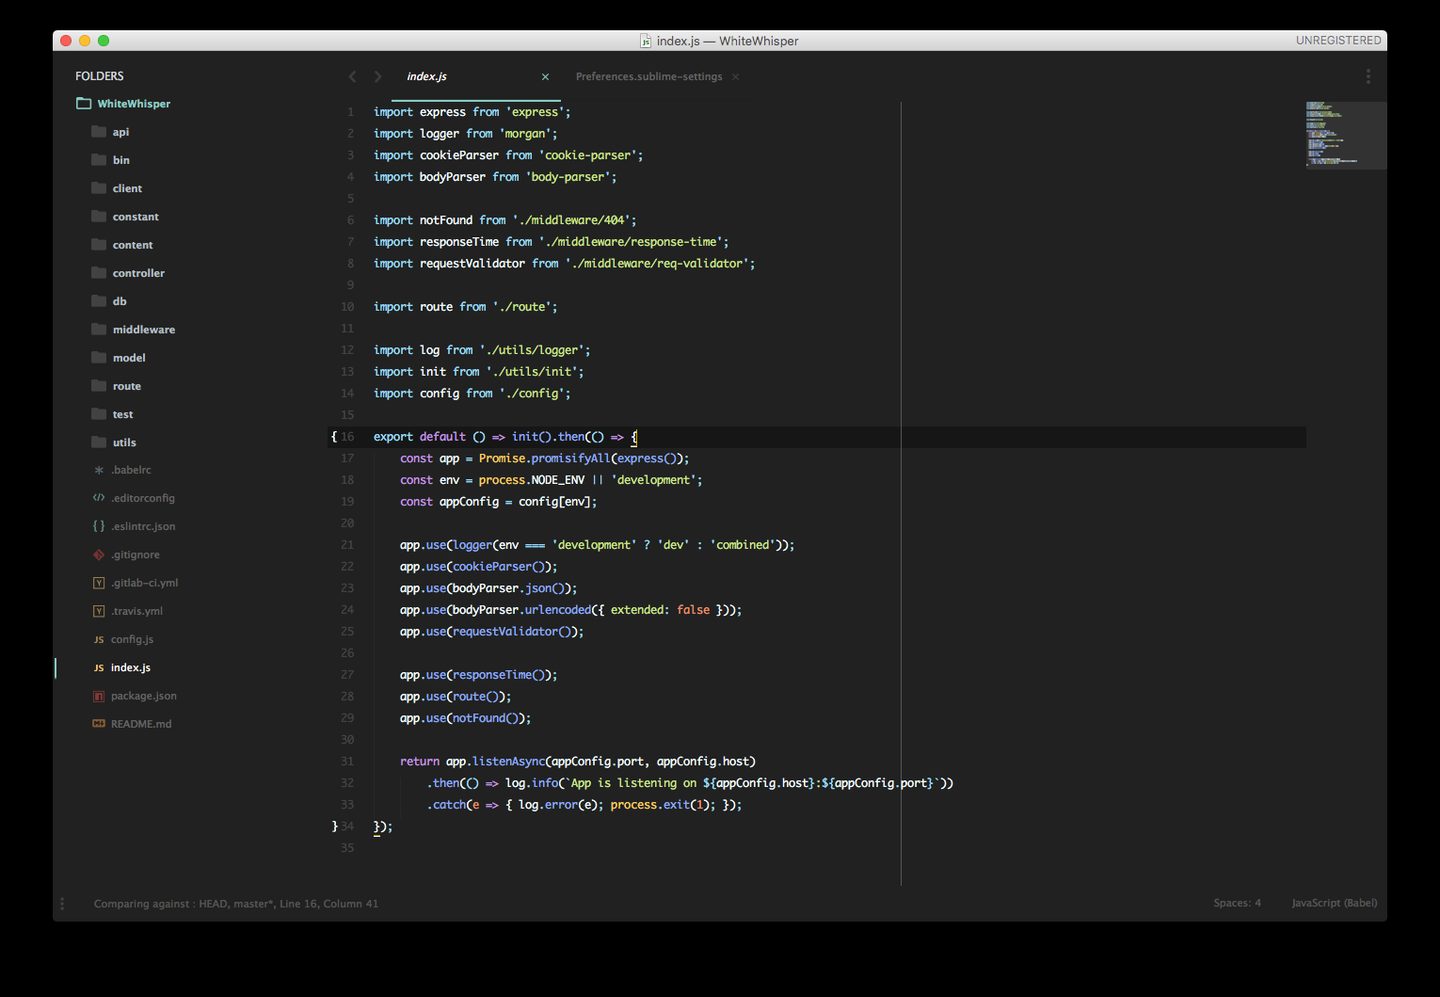
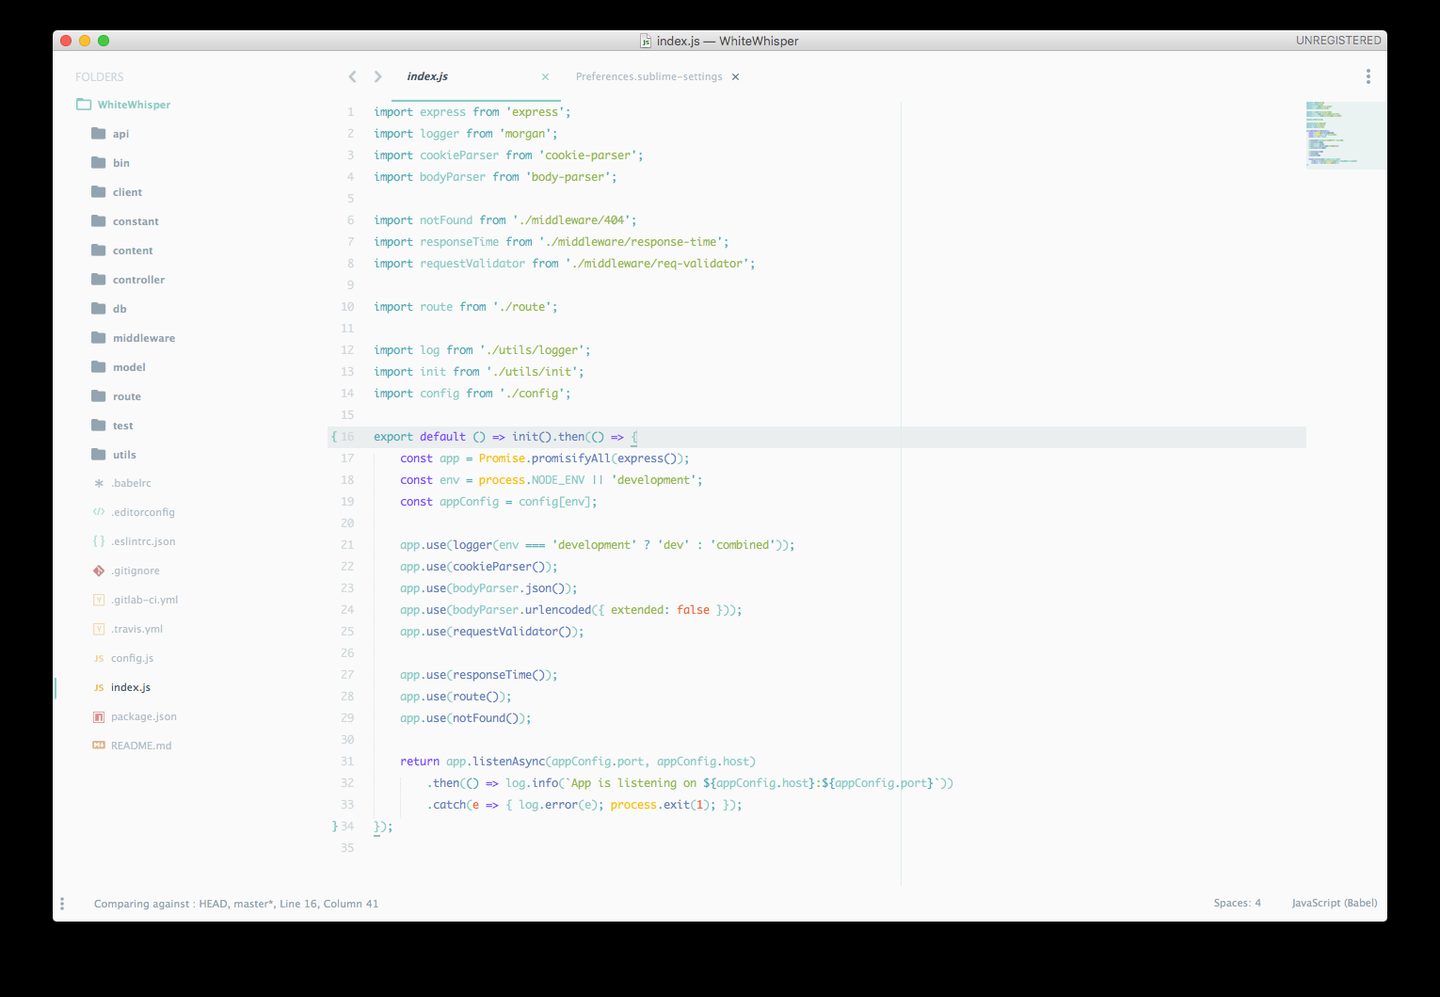
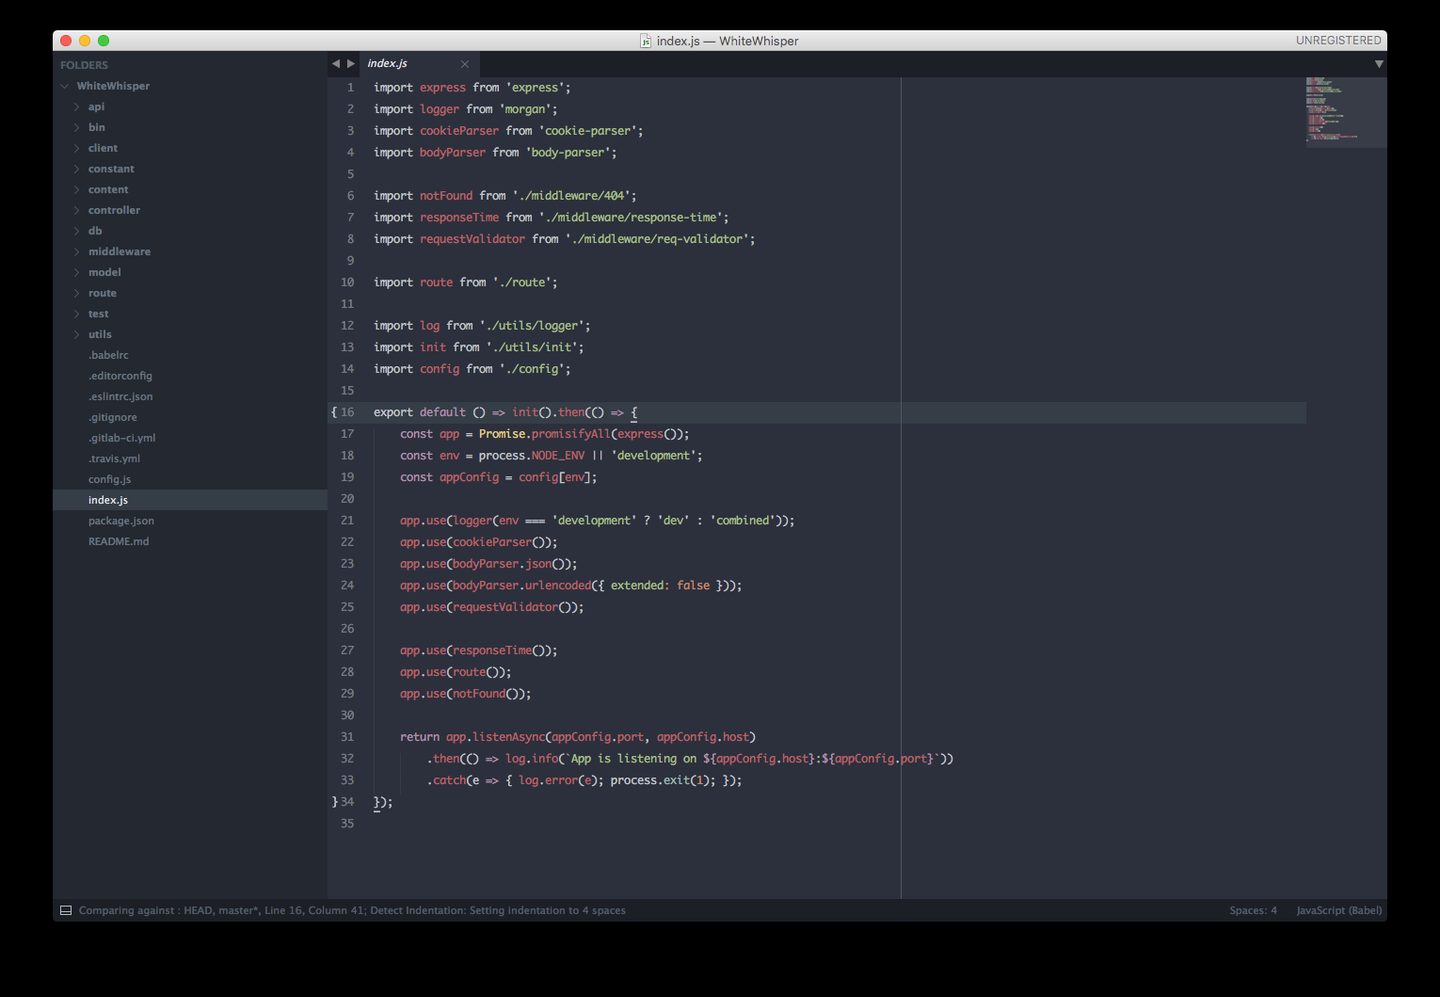
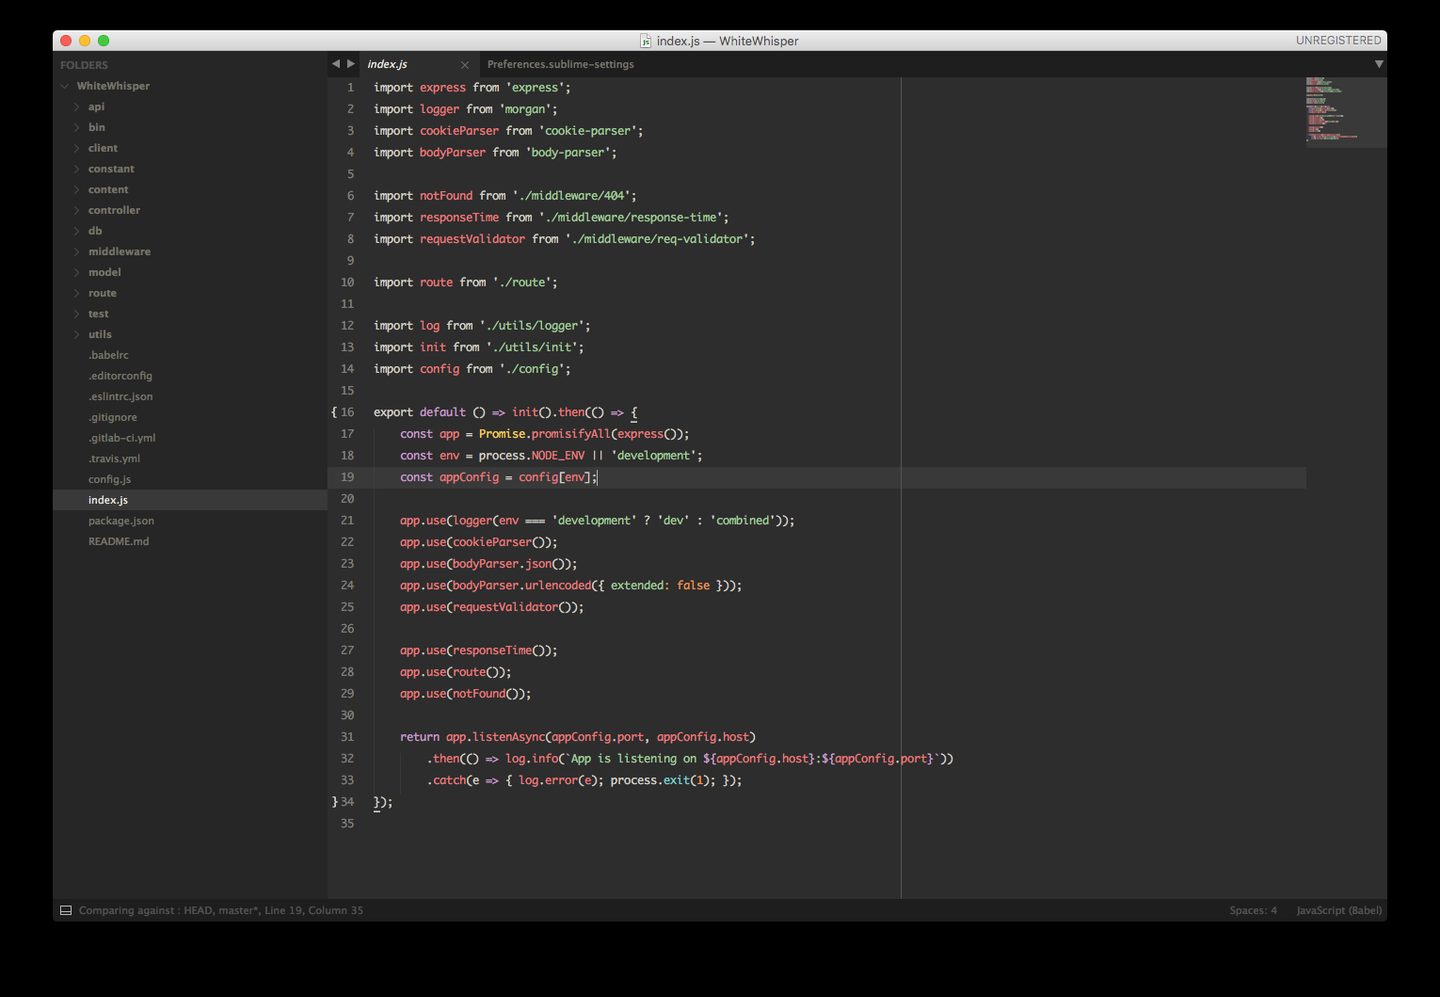
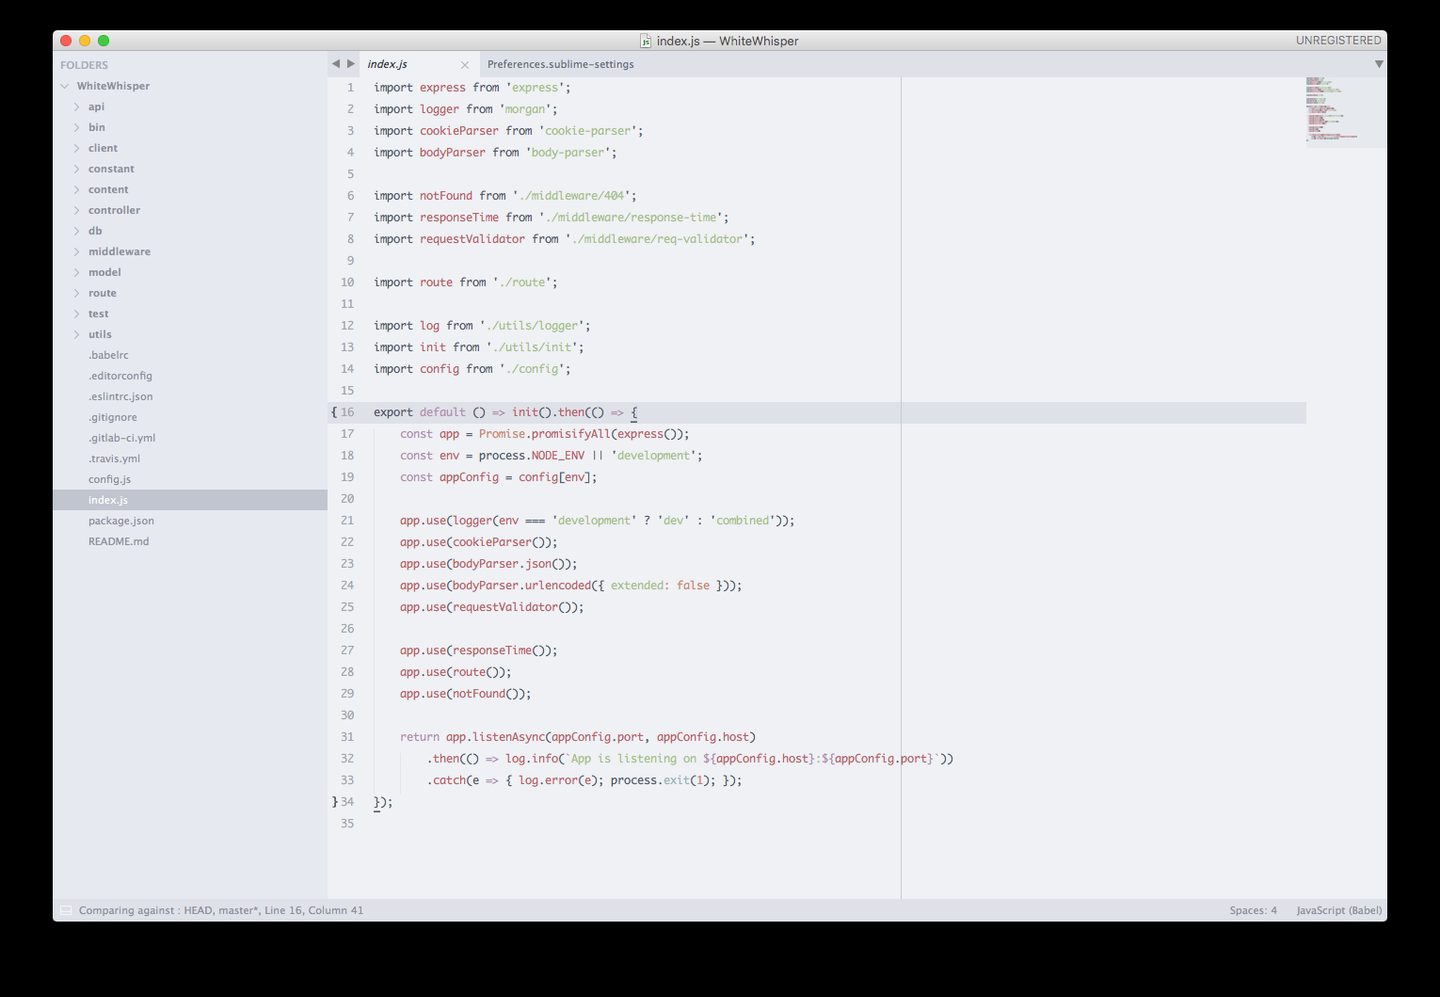
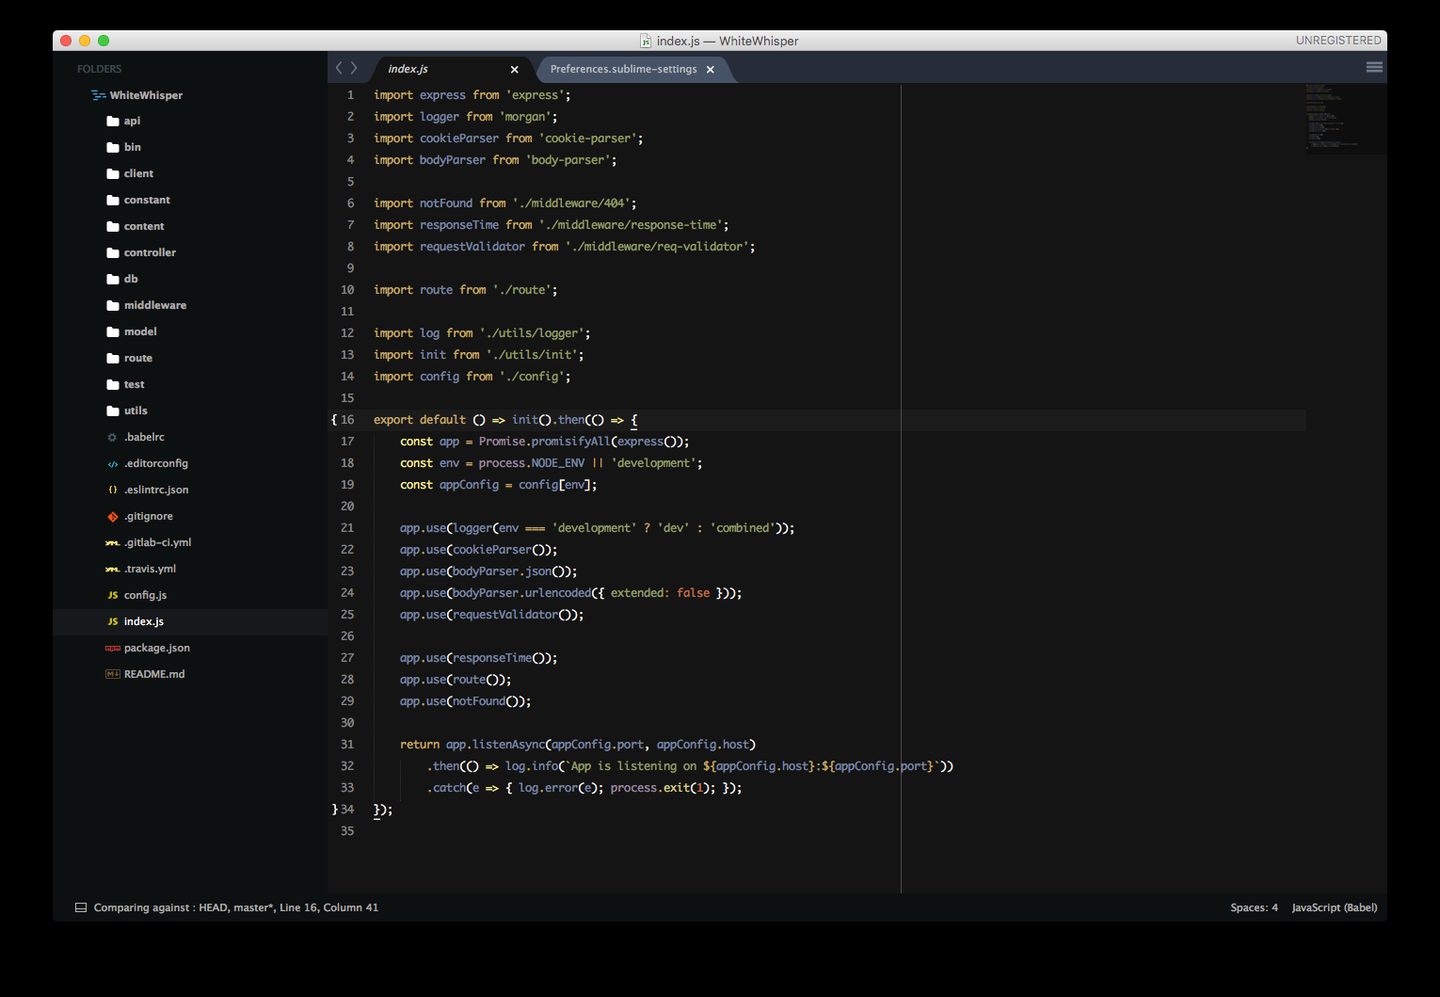
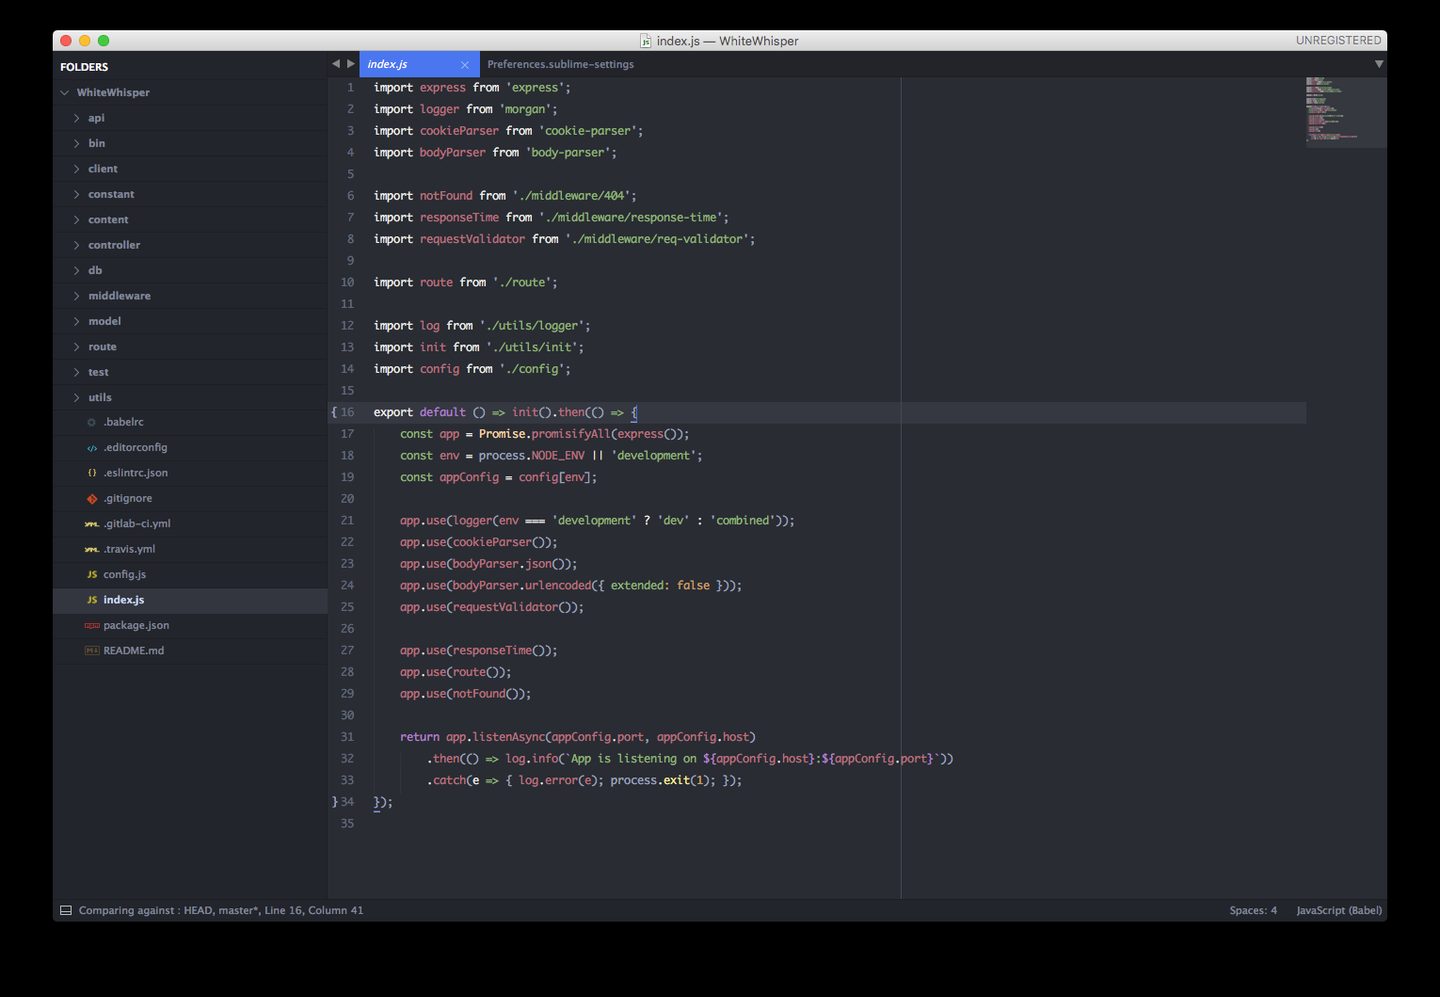
As someone who cares a lot about appearance, how can you code happily without a beautiful editor?! To be honest, the difference in appearance between using a theme and not using one is really more than just a little.
The following themes are all ones I have used and found very good. I personally strongly recommend Material Theme—it is simply fantastic. After installing the plugin, you need to manually modify the configuration file for it to take effect. That is, use Cmd + Shift + P to open the panel and type
setting, select Preferences: Settings - User , after opening it, you can edit the configuration file.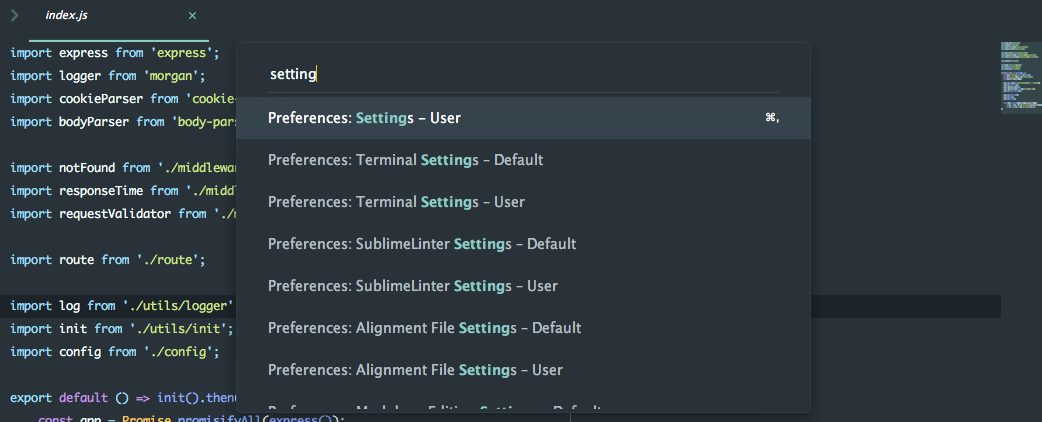
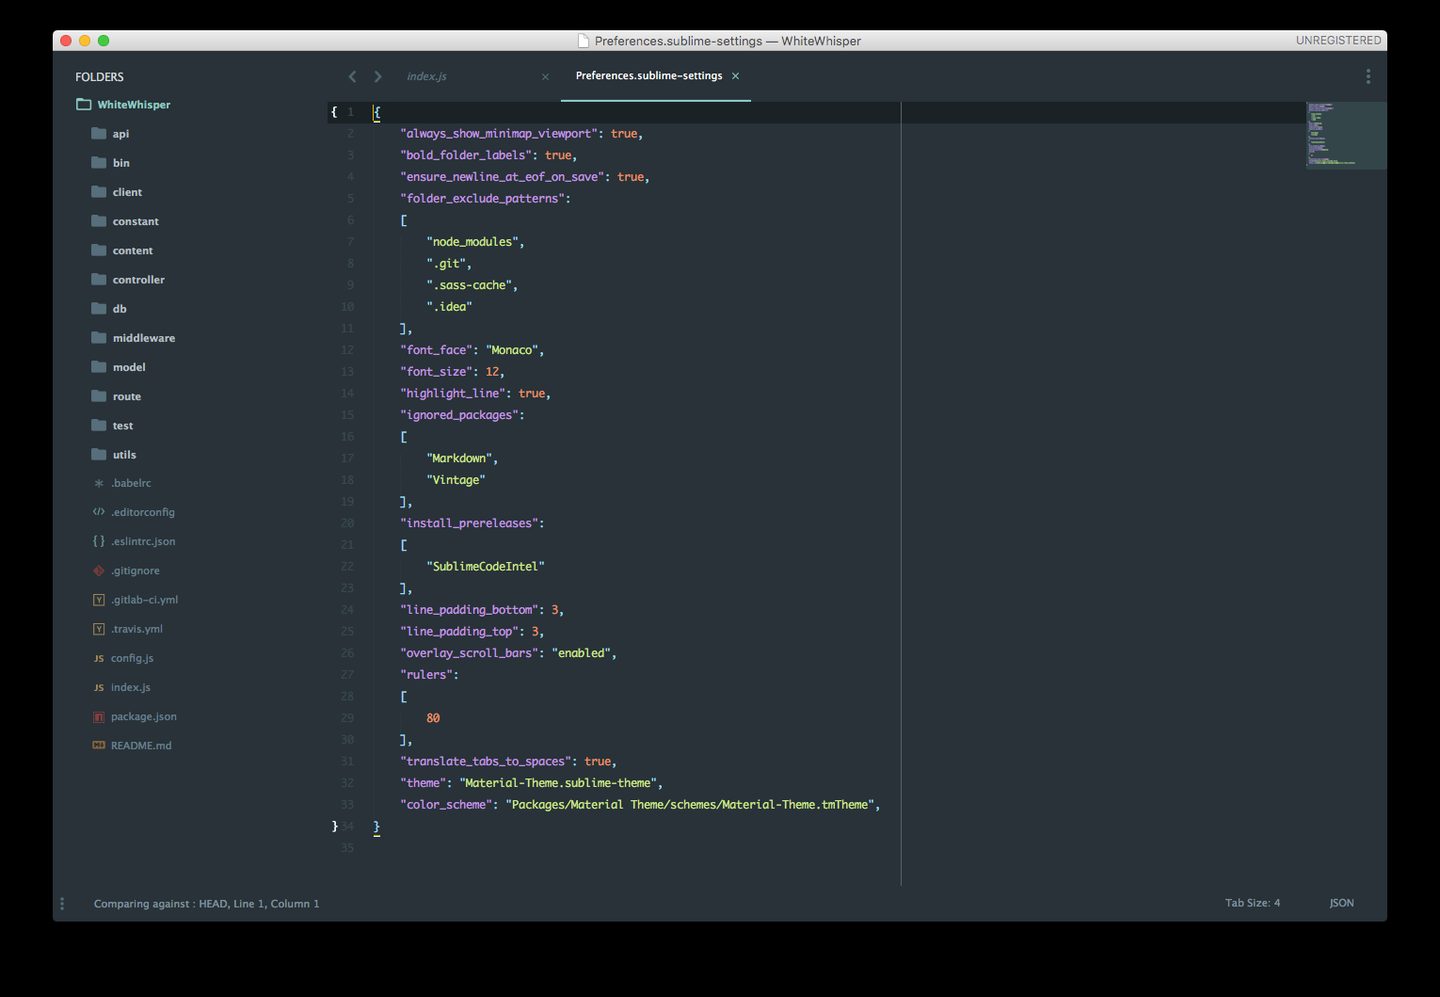
Among them
theme and color_scheme are the configurations we need to replace.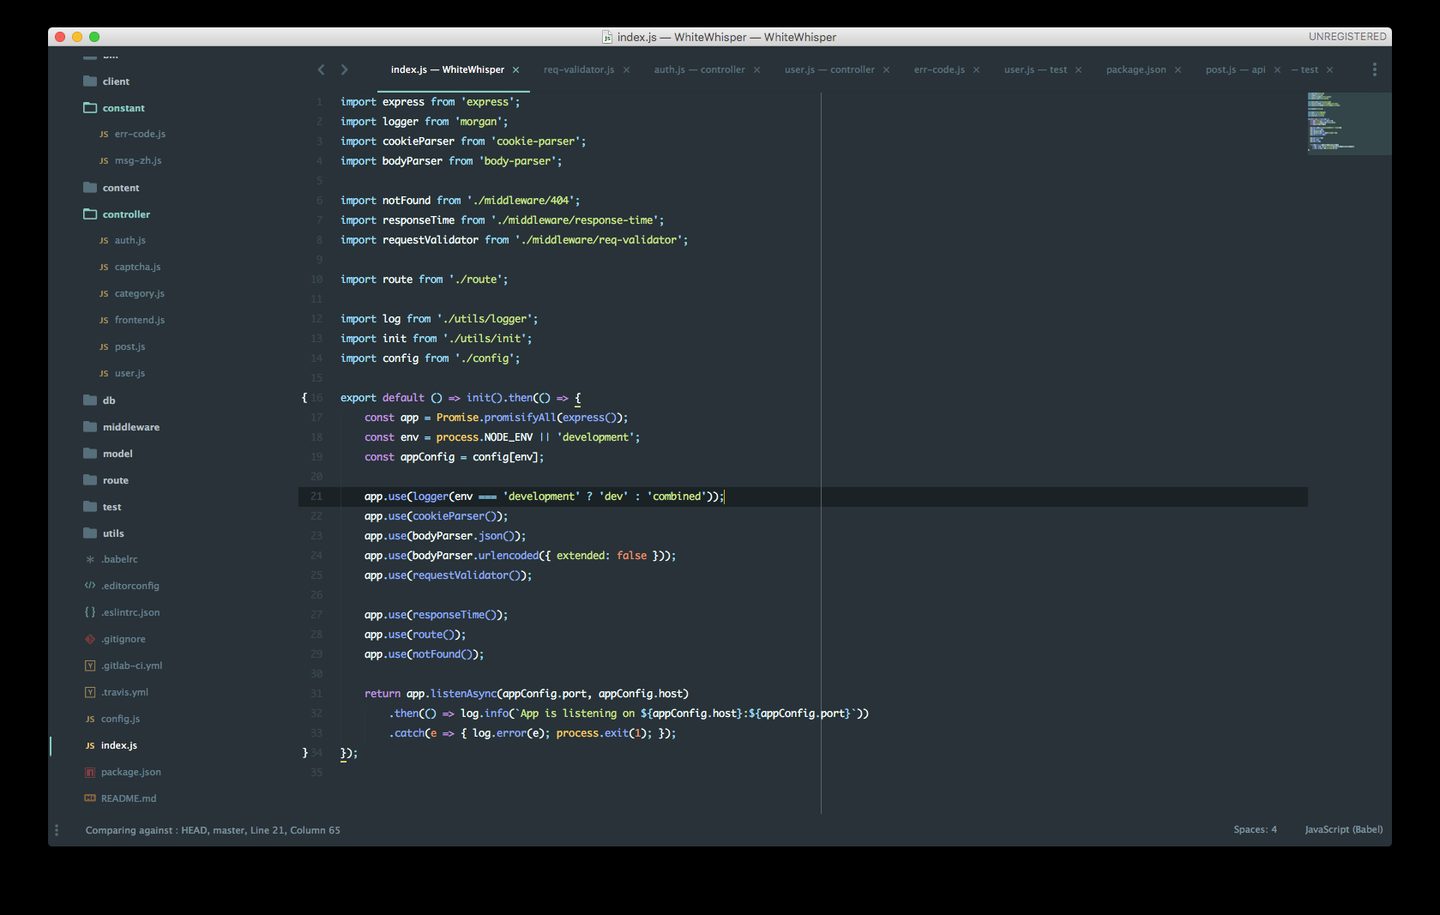
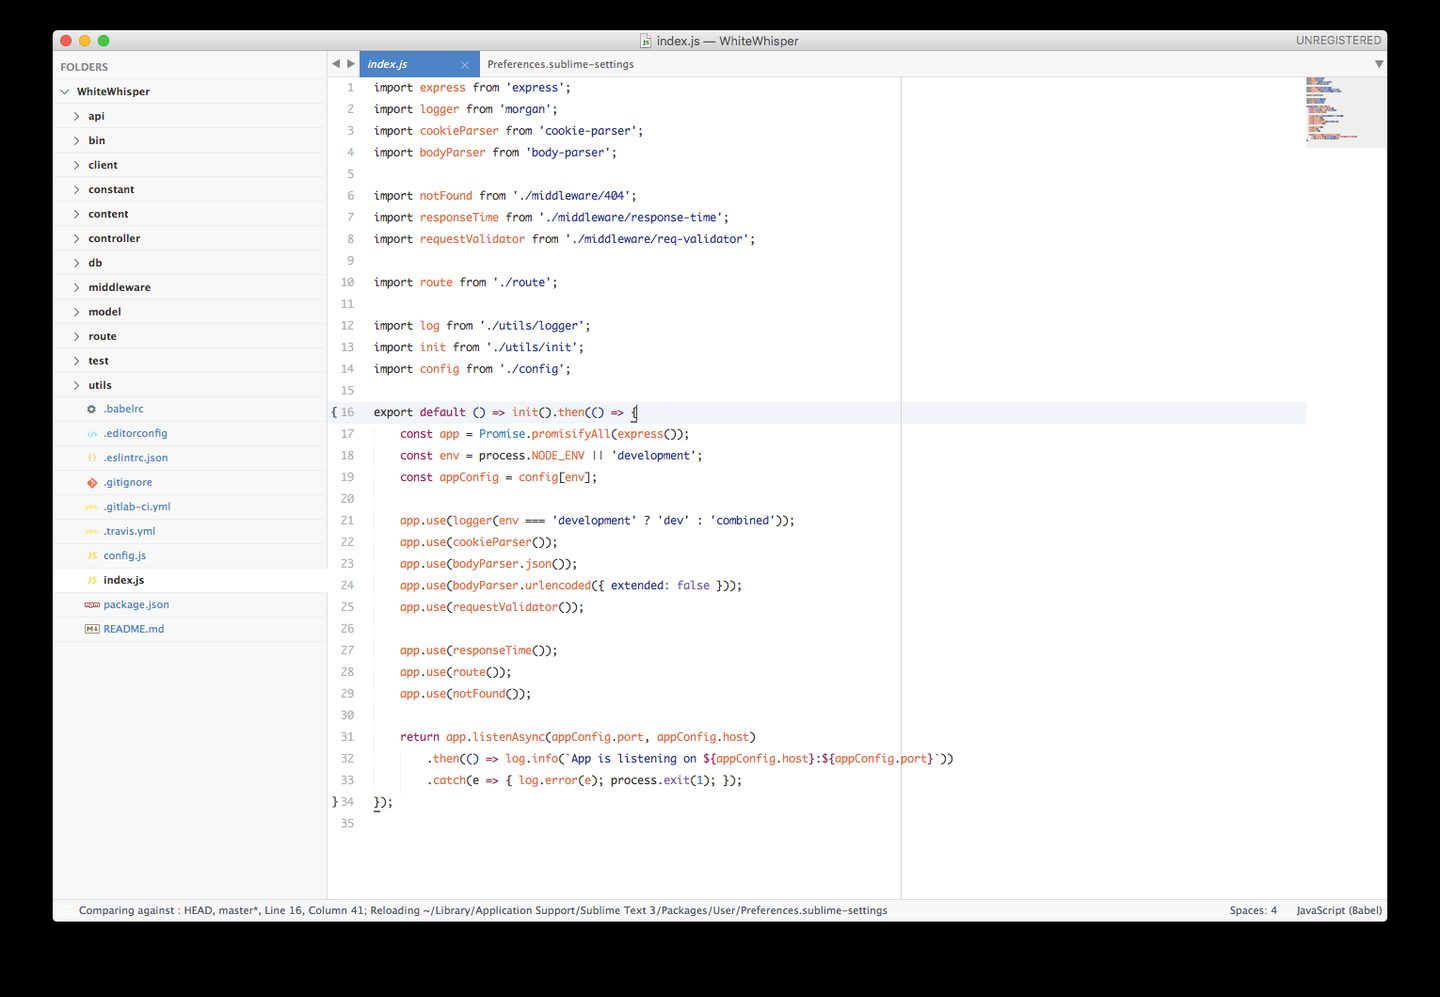
Reference Configuration
Various Sublime Text settings can be configured by editing the user configuration file. That is, open the Package Control panel and then open
Preferences: Settings - User . Below is the configuration I personally use. Readers may choose according to their own needs. If you want to configure more options or have questions about one of the options, you can open Preferences: Settings - Default to view all configuration options and comments for each setting.{
"always_show_minimap_viewport": true,
"bold_folder_labels": true,
"ensure_newline_at_eof_on_save": true,
"folder_exclude_patterns":
[
"node_modules",
".git",
".sass-cache",
".idea"
],
"font_face": "Monaco",
"font_size": 12,
"highlight_line": true,
"ignored_packages":
[
"Markdown",
"Vintage"
],
"install_prereleases":
[
"SublimeCodeIntel"
],
"line_padding_bottom": 3,
"line_padding_top": 3,
"overlay_scroll_bars": "enabled",
"rulers":
[
80
],
"translate_tabs_to_spaces": true,
"theme": "Material-Theme.sublime-theme",
"color_scheme": "Packages/Material Theme/schemes/Material-Theme.tmTheme"
}